This document describes the most important features of Management Portal for related user roles.
User Guide for System Admin
Create a project
First step to manage a study in RADAR-base is to create a project in Management Portal. Creating a new project can be done by a user with the SYSTEM_ADMIN role.
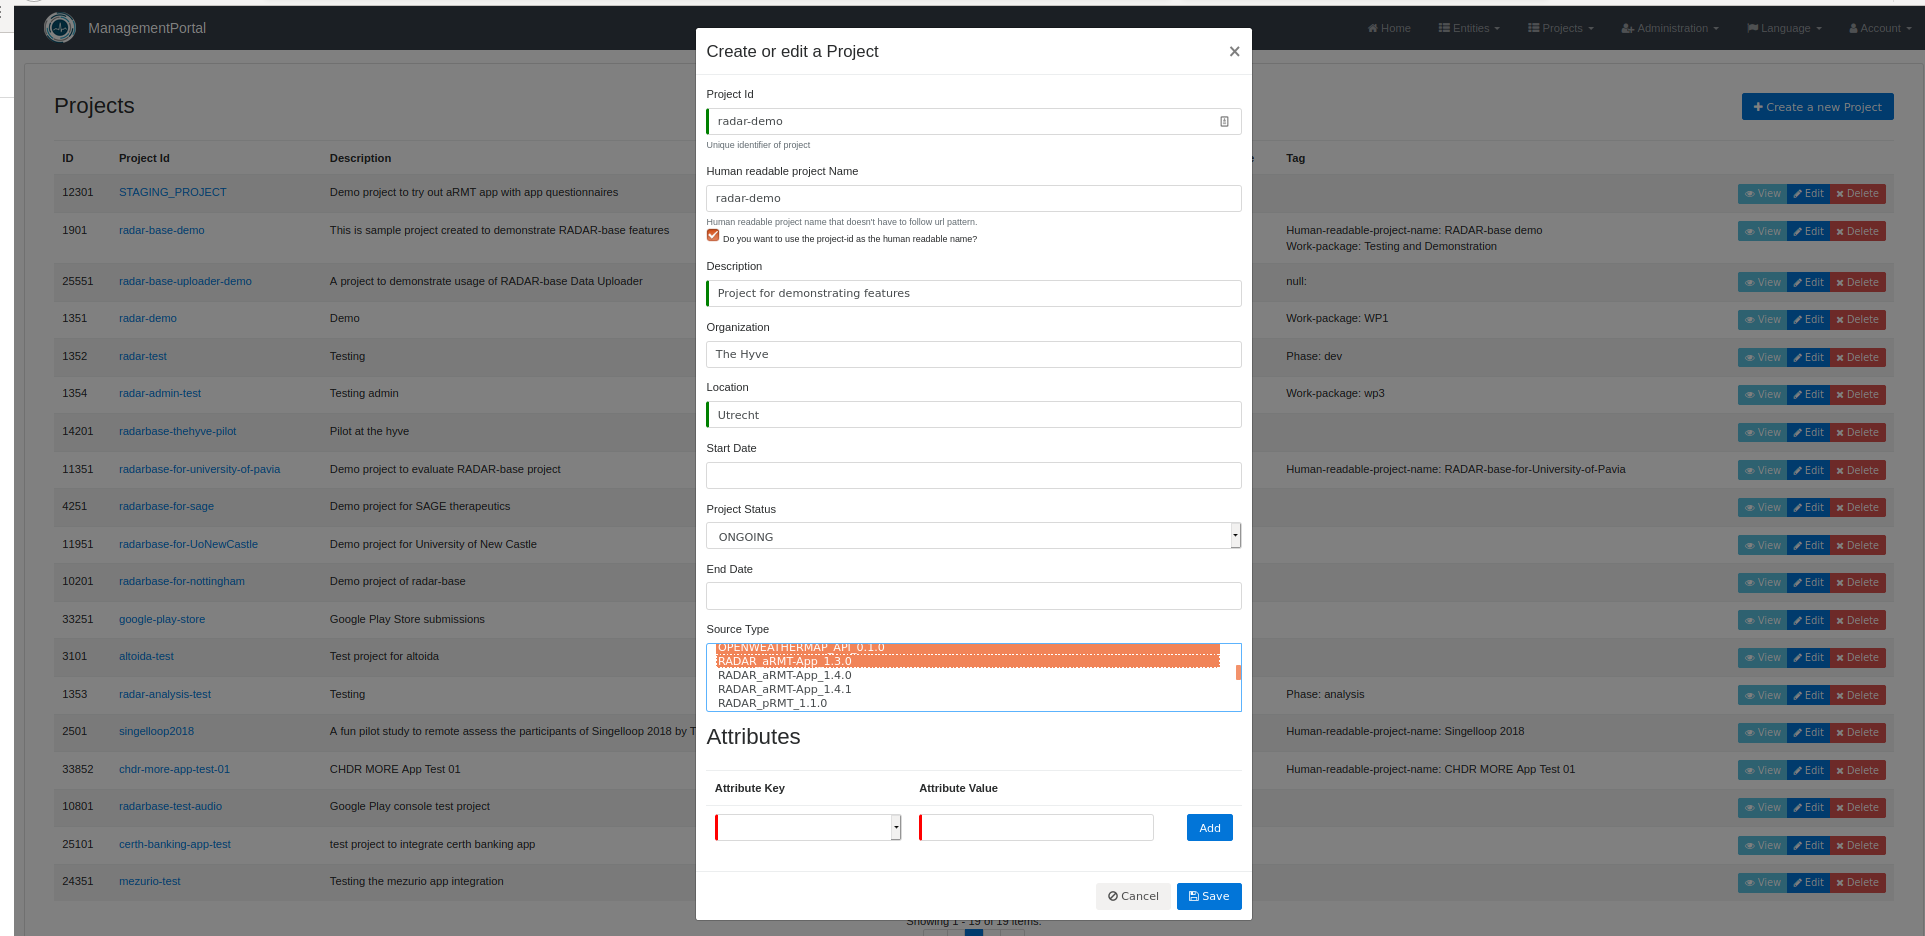
Create a ‘Project’ to manage your study in ManagementPortal at `<your-platform-url>/managementportal/`. (For System admin only)
Login as SYSTEM_ADMIN,
Then Administration -> Projects -> Create a new Project
Enter project details (e.g. name of study, selection of data source types used in study) and click Save.
Managing users
A user with SYSTEM_ADMIN role can create new users with SYSTEM_ADMIN role and users with project specific roles. Users with SYSTEM_ADMIN role have access to all resources in Management Portal and access information from all studies. Users with project specific roles, in contrast have access to only the projects their roles are mapped to. A user can have multiple roles in one or more projects.
Creating a user with SYSTEM_ADMIN role
Login as SYSTEM_ADMIN,
Then Administration -> User Management -> Create an admin user.
Enter user details and click on the Save button.
Creating a user with SYSTEM_ADMIN role
Login as SYSTEM_ADMIN,
Then Administration -> User Management -> Create a new user.
Enter user details and add project specific roles, click on the Save button. (Please note only PROJECT-ADMIN and SYSTEM-ADMIN users are fully supported by Management Portal web interface at the moment.)
Once a user is created, the user will receive a reset link via email to reset the password and to activate their account (to the email address specified in Management portal). It has an expiry time. If the user was unable to reset the password before the expiration, it is possible to resend a reset link to the user. It can be done by clicking on the Send activation link button.
To remove a user from the system, please click on the Delete button.
User Guide for Project Admin and System Admin
Managing a study
Once a project is created, new users can be added to the project.
All project specific details can be managed from Project view. To go to the project view of a project, go to Projects -> Name of the project. Then you will see the project view.
Assigning source-types
A user can modify the project properties by clicking on the Edit button. The project admin or system admin can choose which of the data source types should be in a project. This can be done by assigning the Source types for a project. To do so, please click on the Edit button, then select the source-types, then click on the Save button.
Enrolling participants
To enrol a new participant to a project, please create a new Subject on corresponding project. To do so, please click on the Create a new Subject button. You can optionally enter additional information such as External link (e.g. link to redcap), external-id (e.g. record id of a subject on redcap), then click on Save button.
This step is automated using some integration system for specific study set-up. E.g. for RADAR-CNS and RADAR-AD studies, there is an integration system available to automatically create participants for subjects recorded in RedCap system.
On-boarding participants to use RADAR-base apps
To enable a participant with using RADAR-base supported apps such pRMT app, aRMT app or other, please follow the steps below.
Install the app on your phone and open the app. You will see a Scan QR code button on you app.
Click on Pair App on the subject you created.
You will see a pop-up. From the Client app drop-down, choose the app you want to enable (e.g. aRMT). Click on generate QR Code button.
Then you will see a QR code generated for you.
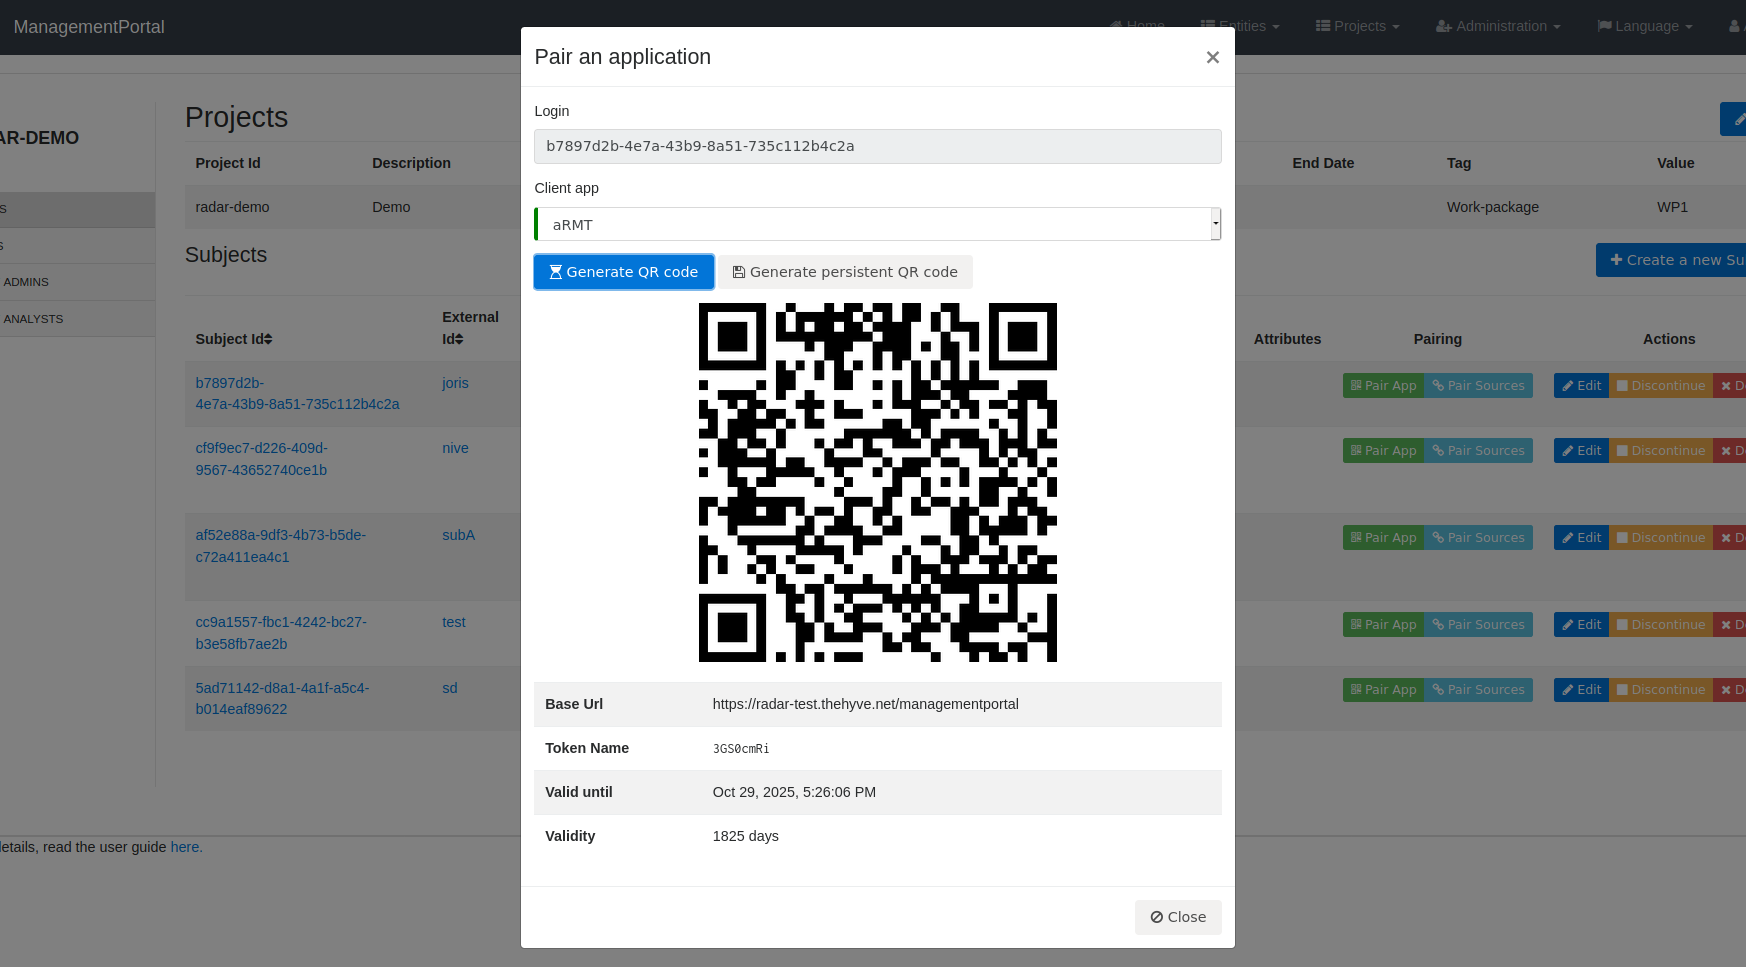
Scan the QR code from your app, allow permissions when requested.